Unraveling the Secrets of Chocolate Planet Earth
Introduction
Welcome to our comprehensive guide to the delectable world of chocolate and our journey to create the ultimate Chocolate Planet Earth masterpiece. In this article, we will unveil the art of crafting a mouthwatering chocolate globe that not only satisfies your taste buds but also sparks your imagination.
Understanding the Art of Chocolate Sculpting
Chocolate as a Versatile Medium
Chocolate has long been celebrated for its versatility, making it a favorite medium for culinary artists and Planet Chocolate Box. From luscious truffles to intricate sculptures, its malleability knows no bounds. To embark on our quest for the Chocolate Planet Earth, we must first understand the various types of chocolate that play a pivotal role in our creation.
- Dark Chocolate: Known for its intense, bittersweet flavor, dark chocolate provides the perfect canvas for sculpting intricate details.
- Milk Chocolate: With its creamy texture and mild sweetness, milk chocolate serves as the foundation for our delectable masterpiece.
- White Chocolate: This ivory delight brings a touch of elegance to our chocolate creation, enhancing the aesthetics.
Essential Tools and Ingredients
Before diving into the sculpting process, it's crucial to gather the necessary tools and ingredients. Here's a list of what you'll need:
- High-quality chocolate bars (dark, milk, and white)
- Double boiler for melting chocolate
- Spherical mold for creating the globe shape
- Food-grade brushes for painting details
- Edible gold or silver dust for a touch of glamour
- Wax paper for easy chocolate removal
- A little patience and a lot of creativity
The Chocolate Planet Earth Sculpting Process
Melting and Layering
Begin by melting your dark chocolate in a double boiler. This will serve as the outer layer of our Chocolate Planet Earth.
Coat the inside of the spherical mold with a generous layer of dark chocolate. Allow it to set in the refrigerator for about 30 minutes.
While the dark chocolate layer is setting, melt your milk chocolate. This will represent the continents on our chocolate globe.
Once the dark chocolate has set, carefully remove it from the mold and place it back in the refrigerator.
Coat the interior of the mold with a layer of milk chocolate, ensuring you leave room for the white chocolate representing the polar ice caps. Allow it to set.
Adding Details
Now, it's time to add intricate details to our Chocolate Planet Earth. Using food-grade brushes, carefully paint the continents onto the milk chocolate layer. Refer to an accurate Earth map for precision.
Once the continents are in place, create the polar ice caps using white chocolate.
To give our Chocolate Planet Earth an extra touch of glamour, dust it with edible gold or silver. This step is optional but highly recommended.
Final Assembly
Carefully remove the milk chocolate layer from the mold and place it onto the dark chocolate hemisphere. Gently press them together to create a seamless globe.
Your Chocolate Planet Earth masterpiece is now complete! Place it in the refrigerator for a final setting.
Serving and Enjoyment
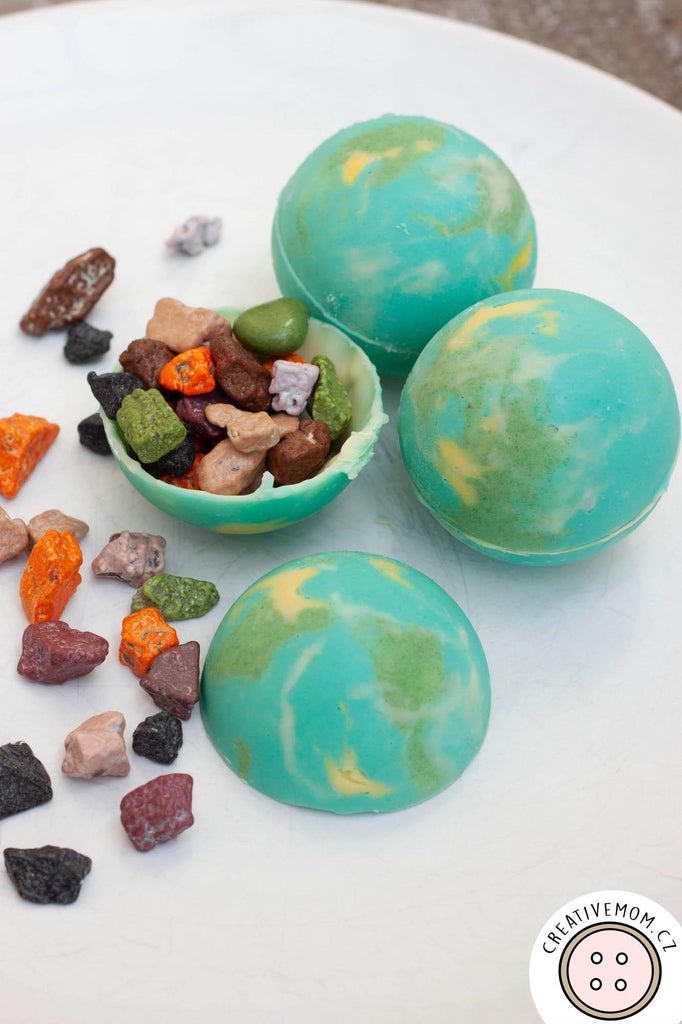
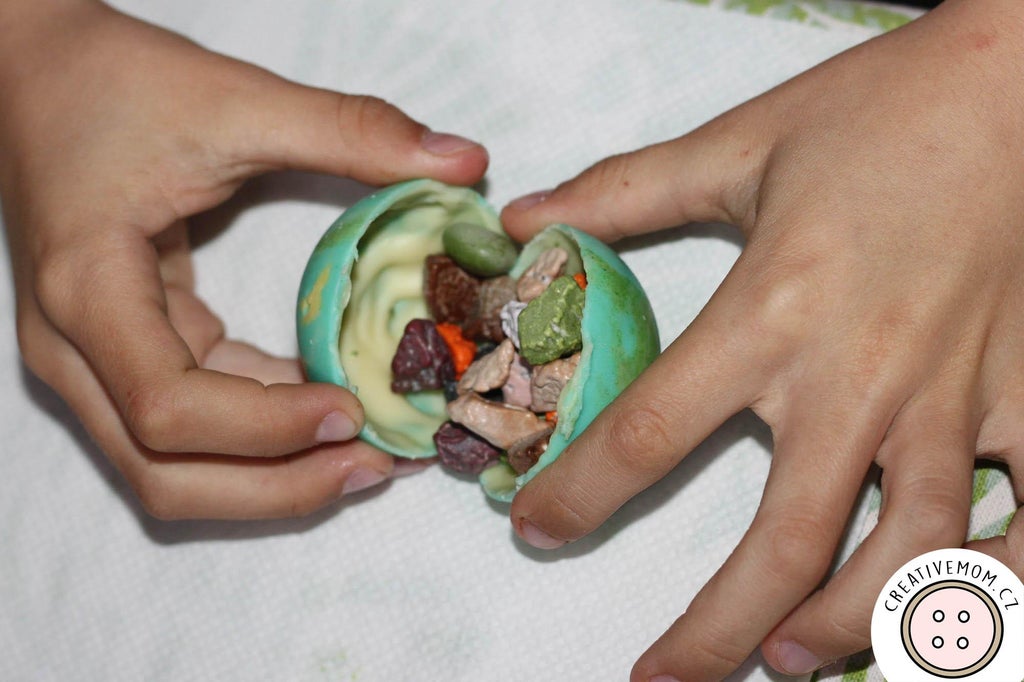
Our Chocolate Planet Earth is not just an art piece but also a delightful treat. When it's time to serve, carefully slice the globe to reveal the layers within. The contrast of dark and milk chocolate, along with the detailed continents, will amaze your guests.
Conclusion
In this detailed guide, we've taken you on a culinary journey to create a stunning Chocolate Planet Earth that will captivate both your eyes and taste buds. The exquisite combination of dark, milk, and white chocolate, along with meticulous sculpting, makes this a one-of-a-kind dessert that is sure to leave a lasting impression. Unleash your inner chocolatier and craft your own version of the Chocolate Planet Earth today!


Comments
Post a Comment